

Migrating calculation views to XSA
With XS Advanced (XSA) SAP offers more extensive development options than in XS Classic. In addition, in the future all developments will take place in XSA. But, what about all the current models? Unfortunately, those cannot be deployed in XSA directly. Thankfully, SAP offers a migration tool that can be used to migrate those models to an XSA model. In this blog I will discuss a simple example of migrating a calculation view. I’ve chosen this example, because it is a recognizable example and allows us to understand how the migration tool works.
The migration tool
The migration tool is called ‘XS Advanced Migration Assistant’ and can be downloaded from the SAP Support Center site. Unzip the download and you can use the program in a Command screen. For more information on installing the tool and preparing your source system please read the ‘SAP HANA XS Advanced Migration Guide’.
The classic Calculation View
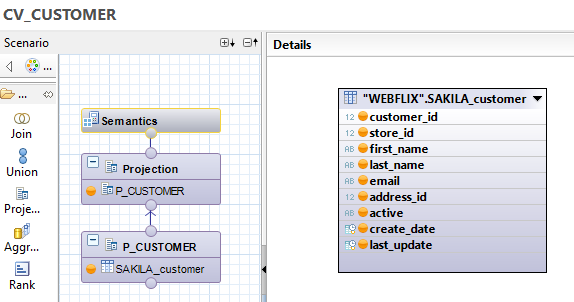
In our system I have created a classis calculation view called CV_CUSTOMER. In figure 1 you can see that it is a simple view, consuming the ‘SAKILA_customer’ table from our “WEBLFIX” schema.
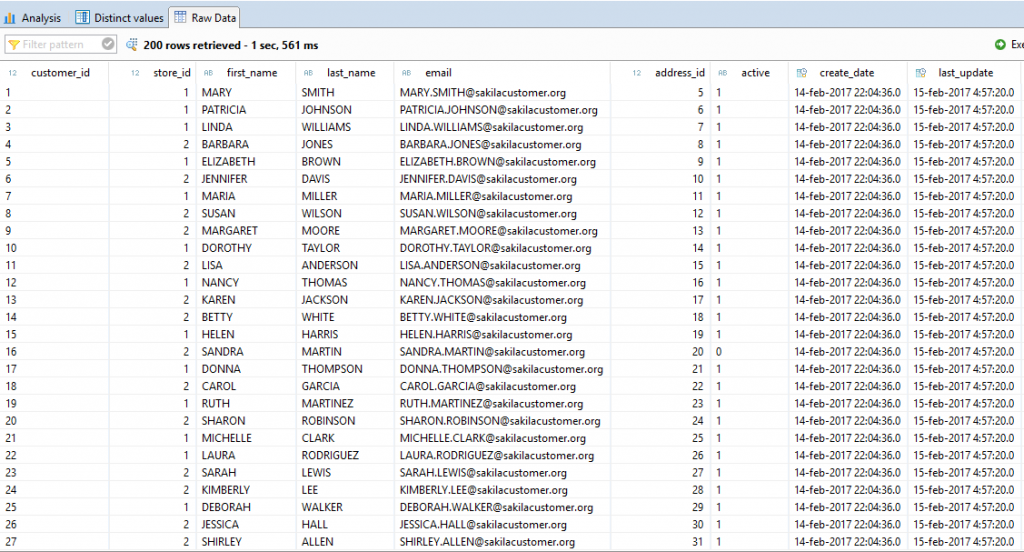
A snapshot of the data (which is fake) that CV_CUSTOMER outputs, is provided in Figure 2.
Step 1. Configure the tool.
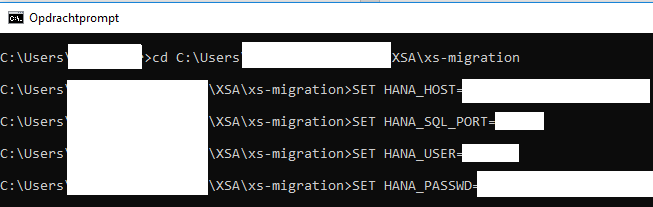
In order for the tool to migrate the views we first tell the cmd line where the tool is located. Then we have to tell the tool how to connect to our HANA system. We set the Host, Port, Database User and Password. There are two ways to do so. First, we can use an .env file containing the data. Second, we can do it manually in the CMD line as seen in figure 3.
Step 2. Run the tool for the Delivery Unit you want to migrate
Now we are ready to start the migration. In order to run the tool we have to do three things:
- Call the migration tool.
- We call the tool using its name: ‘xs-migration’
- Provide the desired directory.
- Start with ‘–target-dir’ and then provide the desired location. This can be any location you want. However, the location must not exist. Thus, the tool will create the actual folder in which the result of the migration is stored. If the location does exist you will get an error as displayed in Figure 4.

- Tell the tool which Delivery Unit to
migrate and the Vendor of that Delivery Unit.
- The CV I want to migrate is located in the HANA Delivery Unit ‘CKROM’ and has as vendor ‘INTERDOBS’.
Taking the above the cmd line will look like figure 5.

Hit enter and the tool will start to migrate the models within the Delivery Unit. When it is finished it will provide an overview of the migration like figure 6.
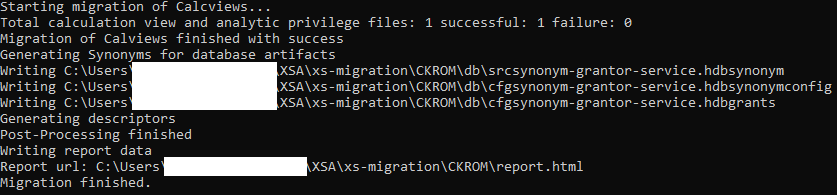
This tells us the migration was successful. In addition, the migration tool created some additional files related to the HDI container used in XSA. HANA with XSC(lassic), use schema’s to manage the tables, HANA 2 with XSA, uses HDI containers. We can use the generated synonyms files to point to the table ‘SAKILA_customer’. However, first we read the migration report. More on the synonyms in step 6.
Step 3. Read the migration report.
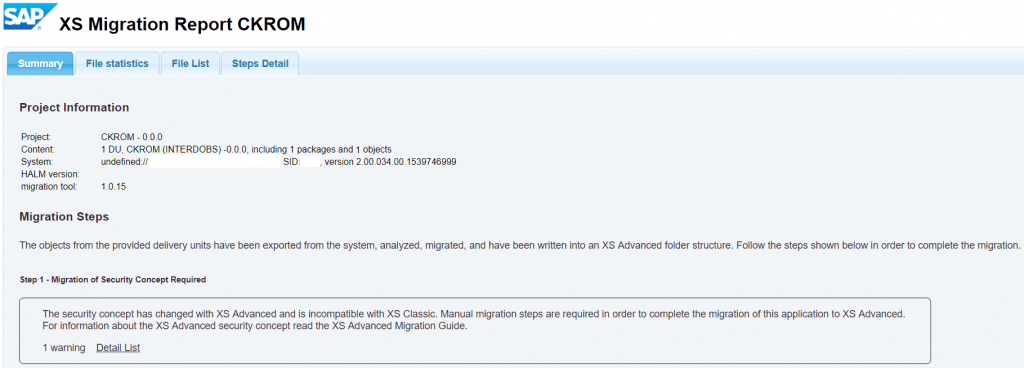
In our designated folder we will find the report as shown in figure 7.

This report contains the information we need to successfully migrate the models. The Summary report (shown in Figure 8) provides on overview of the migration and the steps you have to take next. Depending on the complexity of the models in your Delivery Unit you might have to execute multiple steps. In our case we only have to execute one step: Migration of Security Concept.
Step 4. Make manual adjustments where necessary
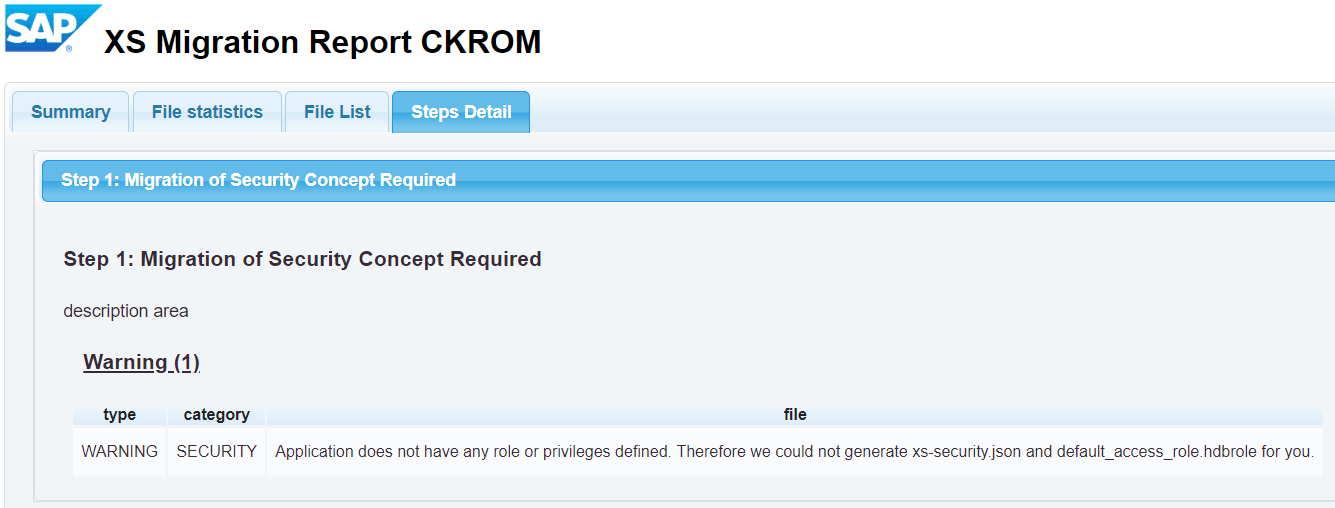
Clicking on ‘Detail List’ under the Migration step will bring up the detail page with more detailed information regarding the migration step. This is shown below in Figure 9.

In my case I only have a warning because I did not secure my model and therefore the migration tool could not migrate that model to the new security concept. For this blog, we are ignoring this warning and leave the security as is.
Step 5. Import the desired models into your XSA project.
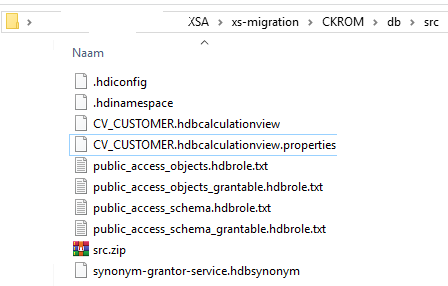
In our migration folder under ‘db’ – ‘src’ we find all migrated objects including the security and synonym objects. We can zip these files into one zip file. This is shown in Figure 10.
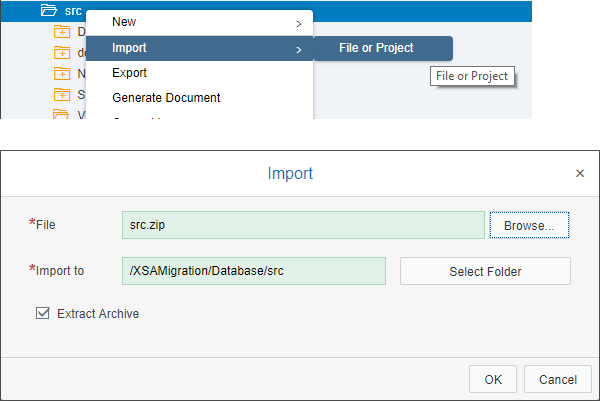
We import this zip file into our XSA Migration project as shown in Figure 11.
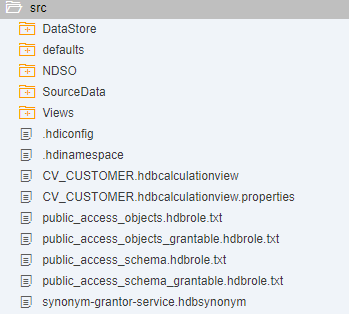
When the import is successful we see the files in our project folder. This is depicted in Figure 12.
Step 6. Check your HDI container
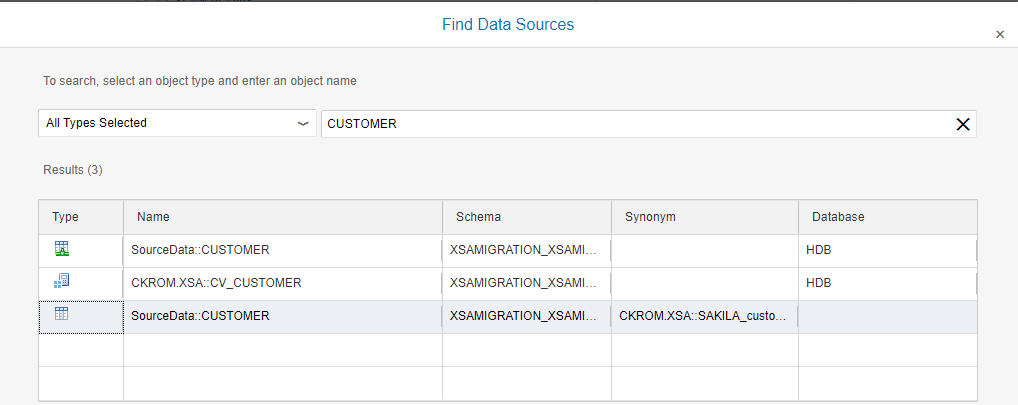
Now that our objects are imported we have to check our HDI container. We have to tell XSA where it can find the data needed for the CV. This is related to the synonym files created in step 2. Thus, we open the Synonym file. In Figure 13 we can see that the source table of the original CV is given the Synonym Name: CKROM.XSA::SAKILA_customer.

By clicking on ‘…’ in ‘Object Name’ we can assign the Synonym to the virtual table that is part of the HDI container which is shown in Figure 14.
Step 7. Build and test your XSA model
Now we are ready to build our model in XSA. We select our files and click on ‘Build Selected Files’ as seen in Figure 15.

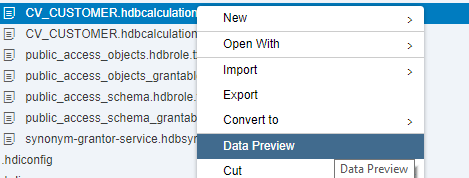
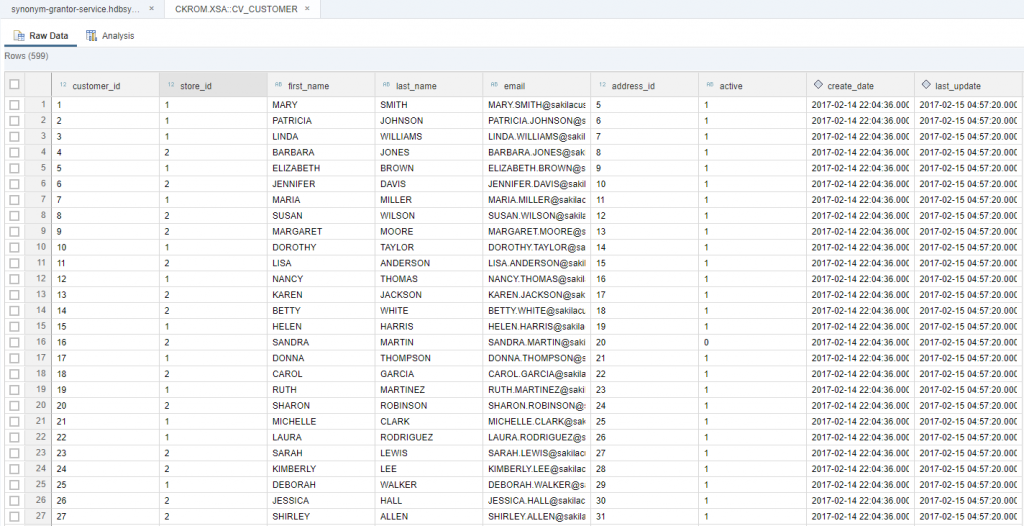
When finished we can check and compare the data from our XSA CV to the old one. Let’s check the data by selecting Data Preview like we do in Figure 16.
In Figure 17 we can see the same data as in Figure 2. Our migration is successful!
Final thoughts
I would have liked to see a more user friendly GUI for the migration tool integrated into HANA itself. Having said that, when you’re used to the cmd interface and understand how the tool works it does work as advertised. One thing I like is that you do not have to migrate the entire package. Looking back at step 5, the import of the models, I could choose not to include the security and synonym files. The same goes for additional models we might have. You can manually select the files you want to import into HANA with XSA. This is especially useful if you have already created those in XSA.
Unfortunately, if a Delivery Unit contains a lot of complex models with a lot of dependencies (think of complex procedure in particular) the migration might take more manual steps and take longer. In addition, some authorization issues could pop up during these migrations. Consuming more time to figure them out. However, the majority of your models should be relatively easy to migrate using the tool.
Do you want to know more about the migration of your models or do you need assistance with the migration? Feel free to contact us for more information.
Call us at +31 (0)6 – 24 66 42 32 or by e-mail info@interdobs.nl