

How to guide – build a PDF export in a SAC Analytical Application
1. Introduction
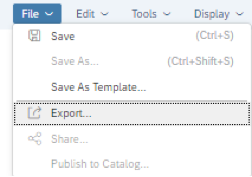
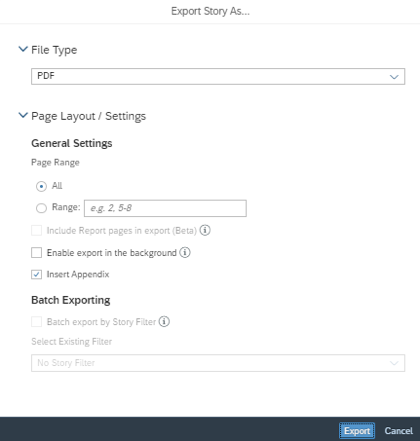
As you probably know, a SAC Story can easily be exported as a PDF file by selecting the “Export” option from the File menu (see screenshots below).
However, this out-of-the-box possibility does not exist when you want to export a SAC Analytic Application as a PDF file.
So how to achieve this? This blog will guide you through the steps to take in order to also have your SAC Analytic Application exported to PDF.
2. Business Case
Suppose we have a SAC Analytical App which consists of a tabstrip with 10 tabs*. Each tab contains its own content, like e.g. tables/graphs. We want to give the user the possibility to export these tabs as PDF files.

*The picture only shows the header of the Analytic Application.
3. Create a PDF file manually
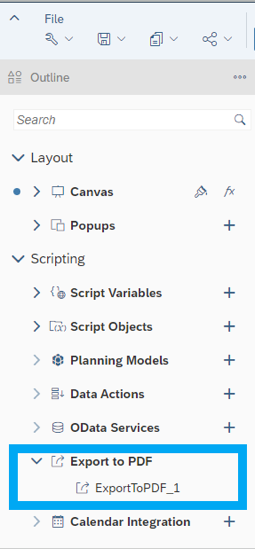
The most easy way is to activate the “Export to PDF” option from the left pane and add a button widget (like “PDF manually” as shown in previous picture) and adding a script for the “onClick” option like: “ExportToPDF_1.exportView();”
By pressing this “PDF manually” button a PDF export is created for the tab which is visible at the moment the button was pressed.
One can also add some more logic to the script like is done in below screenshot in order to give some meaningful filename. In this way the user can already see from the filename what the content is about without opening the file itself. Especially when you have several PDF files I would recommend to do so.
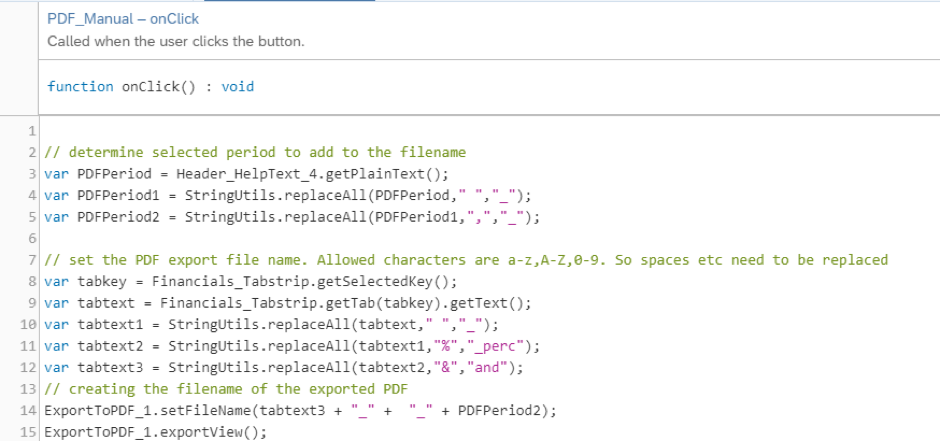
In this script the selected period as shown in the header of the Analytical App is derived to add to the filename as well as the description of the selected tab.
So for example when selecting the third tab and then pressing button “PDF manually” the following PDF file is created:
![]()
A disadvantage of this easy way of creating exports to PDF is that, in case the user wants to export all tabs, he needs to select a tab, press the “PDF manually” button, select the next tab, press the button etcetera.
So that’s where the “PDF automatic” button drops in.
4. Create PDF files automatically
In order to create an automated way of exporting all tabs to PDF files by one single click we need the following ingredients:
- A button widget with scripting which triggers the process
- An array of the tab ID’s which will be used for looping over it (script variable “PDF_Array” is created; type String, set as array ‘yes’)
- A counter which is used to set the selected tab (script variable “PDF_TabIndex” is created; type integer, default value 0)
- A value which holds the length of the array. This value is used to determine when to stop the loop (script variable “PDF_Length” is created; type integer, default value 0)
- A first timer which sets the selected tab, loads the tab widgets, creates the filename and triggers the second timer (“Timer_PDF_1” is created under the Timer option in the left pane)
- A second timer which does the actual export as PDF, raises “PDF_TabIndex” by 1, contains a check if the loop needs to continue, and if so, triggers the first timer again (“Timer_PDF_2” is created under the Timer option in the left pane)
4.1 The “PDF automatic button”
The scripting in the “onClick” option of the button widget “PDF automatic” contains the following:
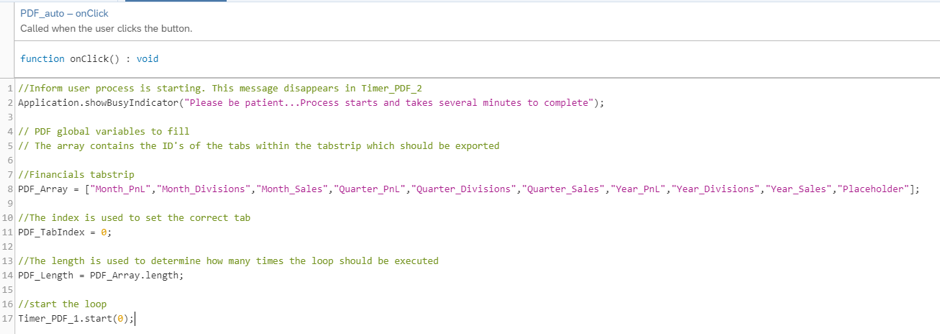
Once the button is pressed, the user gets informed the process is started and it will take some time to complete.
Next the “PDF_Array” is populated with the tab ID’s of the tabstrip, the “PDF_TabIndex” is set to 0, the “PDF_Length” is determined and the loop is started by triggering the “Timer_PDF_1”.
4.2 The first timer: “Timer_PDF_1”
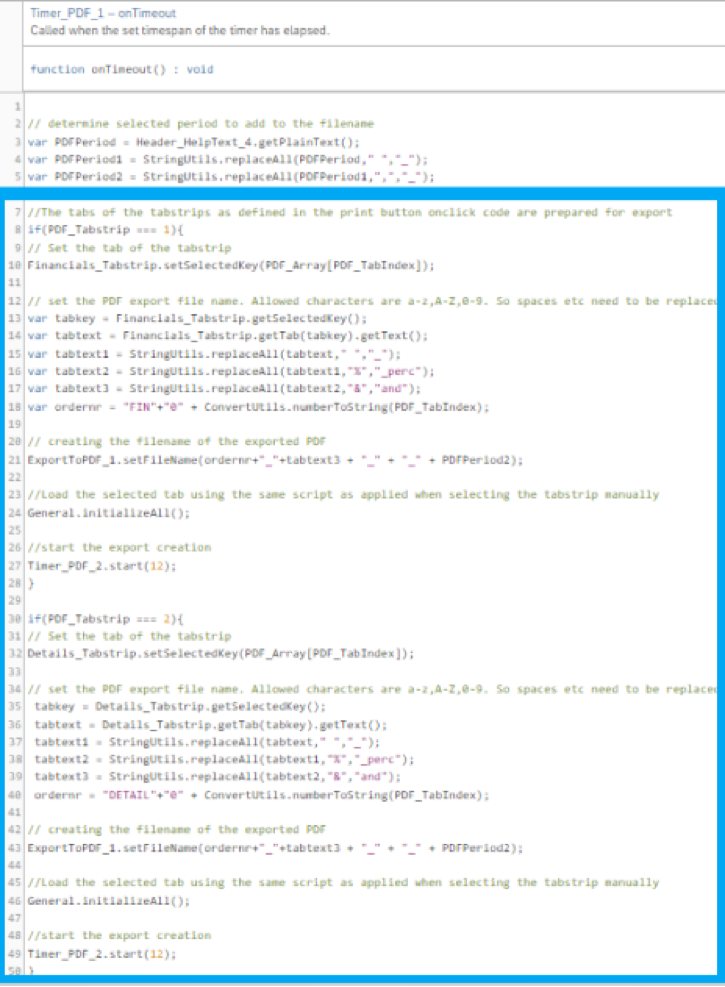
The first timer contains the following scripting:
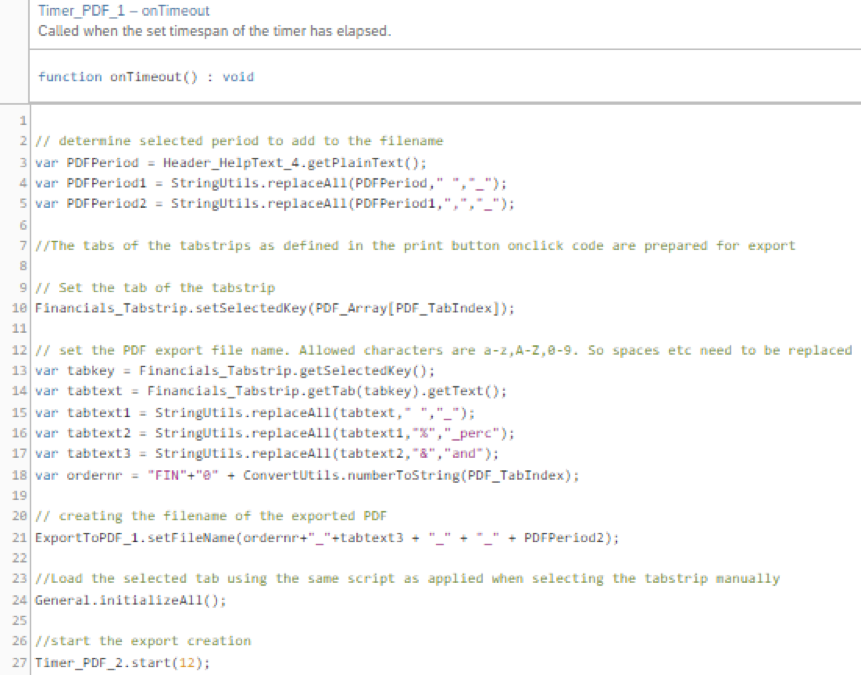
The first part is to derive the selected period to be added to the filename as we saw earlier under the “PDF Manually” button.
In line 10 the first tab of the tabstrip is set as the selected tab: “PDF_TabIndex” has value 0, meaning the first value of “PDF_Array” is used.
Next, the name of the selected tab is derived to add it to the filename, and the filename itself is defined.
Normally, the user would select a tab and then some scripting would be triggered to load the widgets on the tab etc. But because there is no interference of the user here, the process needs to load the widgets on the tab, in this example a General script which holds the logic of the loading is executed.
To conclude this Timer, “Timer_PDF_2” is started with some delay in order to make sure the General script, to do the loading, has been finished before the actual export is created.
4.3 The second timer: “Timer_PDF_2”
The second timer contains the following scripting:
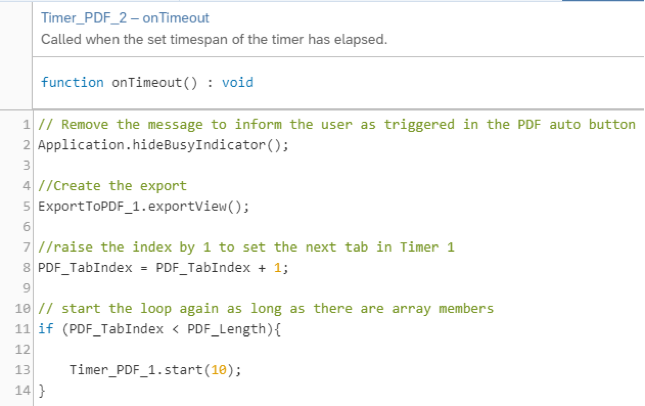
First, we hide the notification which was started by the “PDF automatic” button to inform the user the process starts.
Next, the actual export to PDF is conducted.
“PDF_TabIndex” is increased by 1, so in the first timer this would mean the next value of the “PDF_Array” is going to be set as the selected tab once the first timer is triggered again.
Finally, a check is done to see if the “PDF_TabIndex” is still less than the “PDF_Length”. If so, then the first timer is triggered again. This loop will end once the check is not true anymore, that means there are no tabs anymore to be exported to PDF.
The result of all of this is that 10 PDF files are created:
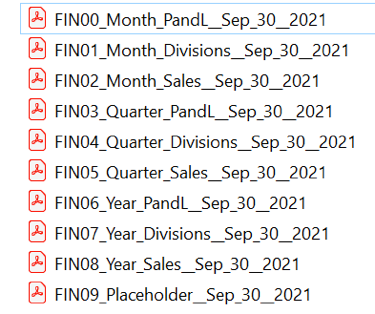
Unfortunately there is no possibility to combine these single files into one PDF file. You should use other tools for that purpose.
Once you understand this concept, you can very easily apply this to other SAC Analytical Applications with of course adjusting the definition of the PDF_Array and adjusting the tabstrip used in the Timer_PDF_1 scripting.
But basically, that’s it. Just activate the Export to PDF, create a button, the script variables, timers and copy/paste the logic.
5. Extend/ adjust the concept
Also, you can customize the logic. For example if the fifth tab never should be exported to PDF, then just remove that tab from the “PDF_Array” definition.
You can also extend the logic, for example if you have tabstrips within tabstrips. In that case you can introduce an additional scripting variable “PDF_Tabstrip” (type integer). When selecting a particular tabstrip in your Analytic Application, you can give “PDF_Tabstrip” a unique value and use that in the logic of the “PDF_automatic” button and “Timer_PDF_1”.
An example:
Suppose you have Tabstrip 1 (called Financials_Tabstrip) which has 4 tabs. Tab 1 contains another Tabstrip (called Details_Tabstrip) which has 2 tabs. Once you select a tab of Tabstrip 1 you set the “PDF_Tabstrip” value to 1, except for tab 1. In case tab 1 is selected you give “PDF_Tabstrip” value 2.
This scripting is added to the “onSelect” option of Tabstrip 1.
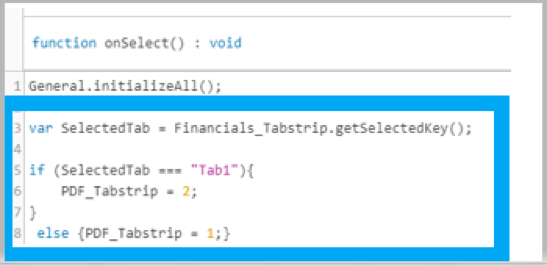
And if you select a tab of Tabstrip 2, then set “PDF_Tabstrip” to value 2.
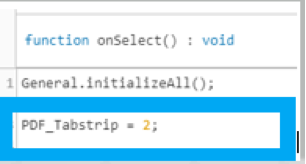
This scripting is added to the “onSelect” option of Tabstrip 2.
In this way, the Analytical App “knows” which tabstrip the user is looking at. This is necessary as the export to PDF functionality only exports what is visible on the screen at that moment.
Since we now have two tabstrips, scripting that needs to be adjusted is the definition of the “PDF_Array” in the “PDF_automatic” button script.
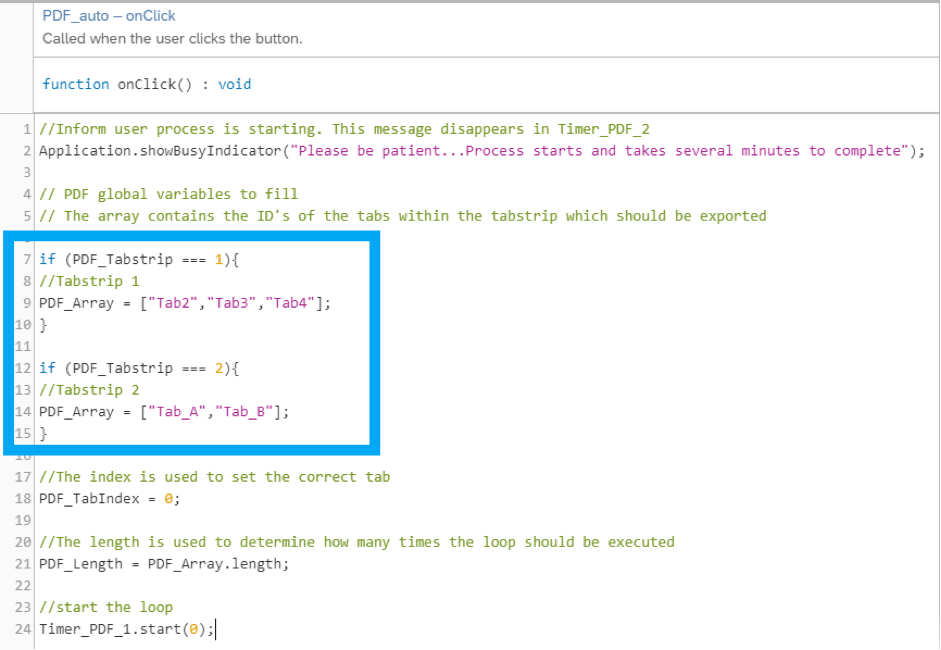
What is good to understand is that Tab1 of Tabstrip 1 is not part of the PDF_Array as this tab has its own Tabstrip, i.e. Tabstrip 2. So, it does not make sense to export Tab1 of Tabstrip 1 to PDF.
And also, the scripting part of “Timer_PDF_1” where the selected tab is set and the tabname is derived and used for the filename needs to be extended as we have two tabstrips.
In fact, the same code is duplicated, but when “PDF_Tabstrip” has value 1 the Financials_Tabstrip is used in the scripting and when “PDF_Tabstrip” has value 2 the Details_Tabstrip is used. No doubt, this can be easier done by creating a general script which uses parameters……. Anyway, this gives an idea of the possibilities.
By adding PDF manually and PDF automatic buttons you give your users full flexibility in exporting a SAC Analytic Application to PDF.